Thursday, 9 March 2017
External Winamp Control Circuit Diagram
Nowadays, winamp have full support to keyboard shortcuts. But some time ago, when Winamp didn’t have this feature, I was thinking in a way I could change the music just by pressing one button, it would make things faster and easier to change songs, specially during games. So I decided to make a external control to it. I found one winamp plugin that shows how to configure a external control using the Serial Port, being able to make 4 or 15 buttons control. I decided to make this, step-by-step, how to do it, hope you enjoy.
Material:
Necessary tools:
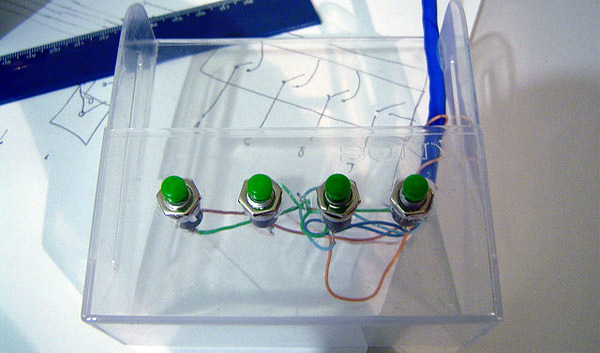
I decided to use a network cable to connect the Serial connector to the buttons, because its easier to organize and makes the work simplier and faster.
The scheme:
Making the control:
Configuring the Software
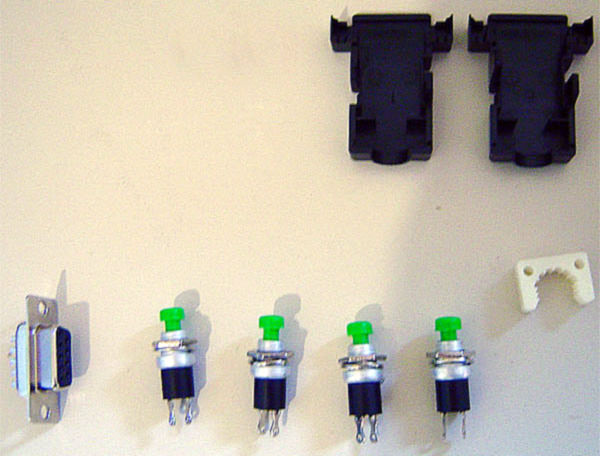
Material:
- 4 push-buttons
- SERIAL connector
- Connector Box
- Cable
Necessary tools:
- Soldering iron and accessories
I decided to use a network cable to connect the Serial connector to the buttons, because its easier to organize and makes the work simplier and faster.
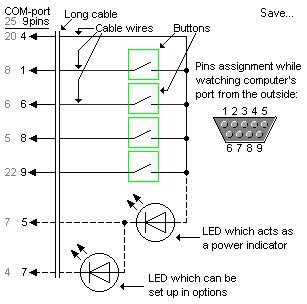
The scheme:
Making the control:
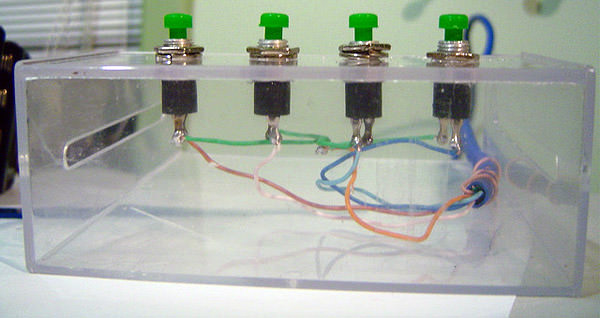
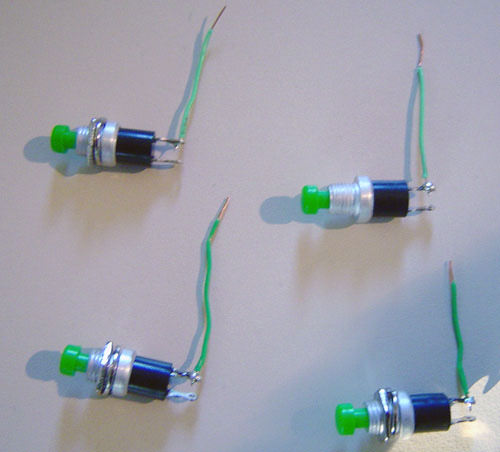
- Looking in the scheme, we see that we have to connect one side of each buttons to one cable, these will be solded in the pin number 4.
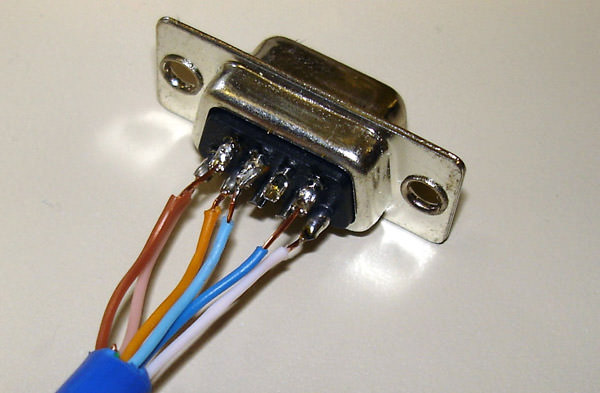
- After have done the soldering in one side of each button, you must then connect the other side with a cable that goes to the pins of the serial, now however is important that they are connected with the indicated pins (Just follow the scheme) .
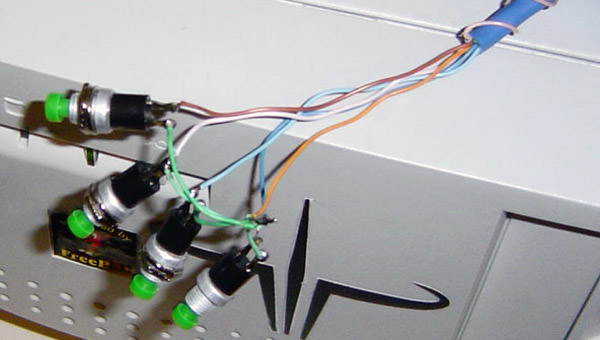
Here you can see a picture of my work until now, it looks quite ugly I know, sorry.
Configuring the Software
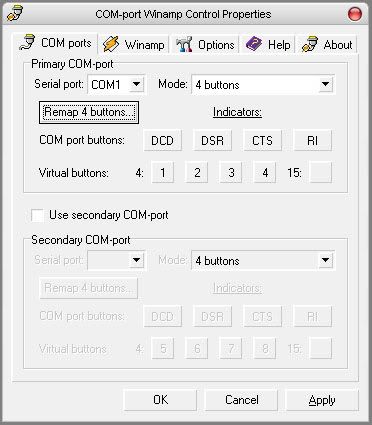
- The software I used in this was COM-port Winamp Control V.1.42.
- You must set the COM port you are using, usually normal computers have up to 2 ports, so just select the one you plugged the control.
- Select the number of buttons your control have. (In this HowTo, we’d choose the “4 buttons”)
- Now you must remap the buttons, its now the time when you’ll see if everything is working. If you are able to remap all the buttons, congrats, its working!!
- Its ready, now the last step, you have to configurate what you want the buttons to do. This can be found in the “WINAMP” of the program. There you can setup many different options, like Volume Up, Volume Down, Next Song, Previous Song.
- One cool stuff is there in “Type:”, where you can configure the way you wanna the buttons pressing to respond.
- Click: Just one click to make it work. Can work with one or double-click.
- Down/Up: This will activate the option when you press and a different one when you release the buton.
- Turbo: Here you can configure the options for holding the button, usually used for Volume Up and Down.
- Clicks + Turbo: You can configure “Clicks” and “Turbo”Option at the same time
- Clicks + Hold: You can configure “Clicks” and “Hold” Option at the same time
I don’t know if I was clear enought in this HowTo, I will re-check this sometime.
If you liked this, have any correction or advice, please leave a comment!
If you liked this, have any correction or advice, please leave a comment!
Source : link
Subscribe to:
Post Comments (Atom)
No comments:
Post a Comment