Wednesday, 1 March 2017

TDA1599 IF amplifier demodulator for FM radio receivers


Circuit Diagram:
TDA1599 IF amplifier/demodulator for FM radio receivers
Datasheet for TDA1599: Download
Readmore → TDA1599 IF amplifier demodulator for FM radio receivers

Automatic Battery Charger Circuit


Basically the circuit designed above have a very simple way of working, where the circuit is designed so that does not happen short circuit or short circuit between the voltage supply with batteries that will be in-charge.


Automatic Battery Charger Circuit

 It is true that if any one wants to try to direct mengghubungkan between supply with batteries then the batteries can be sure will be filled. But the current flowing through a charged battery can not be controlled and if the battery is full, the batteries will be damaged or worn out if it remains on the short circuit condition.

Working Principle Battery Charger

By the time we put an empty battery charging terminals, transistor Q1 will be activated immediately because the current flows through R1 and would trigger a transistor Q1 base. In this condition the flow that would fill the batteries mostly comes from the collector of Q1 is connected directly to the positive terminal of supply. Then during the charging process increases the battery voltage will increase the current flowing in Q2 base via 10 Kohm R5, VR1 and diode D2. VR1 is a component that is used as an initial calibration to determine the exact position in the planning process of switching circuit. For VR1 you can use a trimpot or potensio according to your taste. At the beginning of filling, arrange potensio at position D3 LED indicators on the condition of death, and the current flowing into the collector of Q1 is not too big and not too small.

If the battery is fully charged, the LED indicator will light up automatically because of an increase in voltage on the battery charge will cause the increase of current flowing at the base of transistor Q2 and will terminate the charging cycle due to transistor Q1 having a cut-off due to lack of base current. Why on condition Q1 base current will experience a shortage of this is because almost all the current flowing in R1 10 Kohm will switch to a diode D1 which is logically connected directly with ground experience due Q2 saturated.
.
Component List
1. Resistors: R1 (10 Kohm), R2 (680 ohms), R3 (100 Kohm), R5 (10 Kohm) and VR1 (Potensio / trimpot = 100 Kohm)
2. Diodes: D1 & D2 (IN4002) and D3 (Led)
3. Transistors: Q1 and Q2 (2N3904)
4. 9 volt power supply

Readmore → Automatic Battery Charger Circuit

Stepper motor control using NE555


Readmore → Stepper motor control using NE555

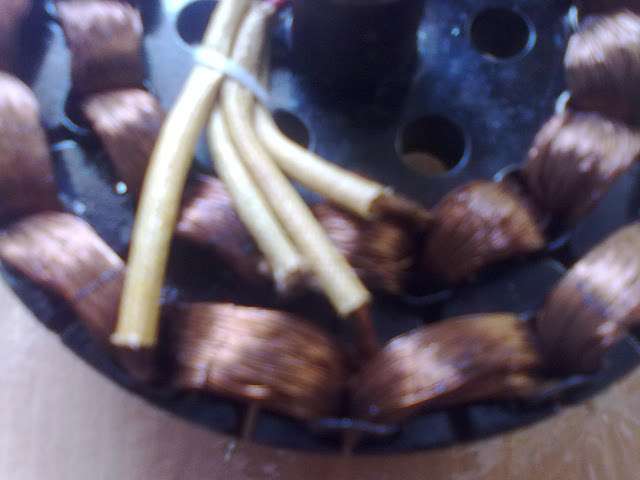
Permanent Capacitor Single Phase Induction Motor Ceiling Fan Motor


Readmore → Permanent Capacitor Single Phase Induction Motor Ceiling Fan Motor

Tuesday, 28 February 2017

Simple Pwm Motor Drive Circuit Diagram


This is the Simple Pwm Motor Drive Circuit Diagram. This circuit will drive a small dc motor over a wide range of speeds without stalling by controlling the duty cycle of the motor, rather than the supply voltage.

Simple Pwm Motor Drive Circuit Diagram

Simple Pwm Motor Drive Circuit Diagram


Readmore → Simple Pwm Motor Drive Circuit Diagram

Monday, 27 February 2017

An Electronic Watering Can Circuit Diagram


An Electronic Watering Can Circuit Diagram. Summertime is holiday time but who will be looking after your delicate houseplants while you are away? Caring for plants is very often a hit or miss affair, sometimes you under-water and other times you over-water. This design seeks to remove the doubt from plant care and keep them optimally watered. 

The principle of the circuit is simple: first the soil dampness is measured by passing a signal through two electrodes placed in the soil. The moisture content is inversely proportional to the measured resistance. When this measurement indicates it is too dry, the plants are given a predefined dose of water. This last part is important for the correct function of the automatic watering can because it takes a little while for the soil to absorb the water dose and for its resistance to fall. If the water were allowed to flow until the soil resistance drops then the plant would soon be flooded.

An Electronic Watering Can Circuit Diagram


An Electronic Watering Can-Circuit Diagram
An Electronic Watering Can Circuit Diagram

The circuit shows two 555 timer chips IC1 and IC2. IC1 is an astable multivibrator producing an ac coupled square wave at around 500 Hz for the measurement electrodes F and F1. An ac signal reduces electrode corrosion and also has less reaction with the growth-promoting chemistry of the plant. Current flowing between the electrodes produces a signal on resistor R13. The signal level is boosted and rectified by the voltage doubler produced by D2 and D3. When the voltage level on R13 is greater than round 1.5 V to 2.0 V transistor T2 will conduct and switch T3. Current flow through the soil is in the order of 10 µA. 

T2 and T3 remain conducting providing the soil is moist enough. The voltage level on pin 4 of IC2 will be zero and IC2 will be disabled. As the soil dries out the signal across R13 gets smaller until eventually T2 stops conducting and T3 is switched off. The voltage on pin 4 of IC2 rises to a ‘1’ and the chip is enabled. IC2 oscillates with an ‘on’ time of around 5 s and an ‘off’ time (adjustable via P2) of 10 to 20 s. This signal switches the water pump via T1. P1 allows adjustment of the minimum soil moisture content necessary before watering is triggered. 

The electrodes can be made from lengths of 1.5 mm2 solid copper wire with the insulation stripped off the last 1 cm. The electrodes should be pushed into the earth so that the tips are at roughly the same depth as the plant root ball. The distant between the electrodes is not critical; a few centimetres should be sufficient. The electrode tips can be tinned with solder to reduce any biological reaction with the copper surface. Stainless steel wire is a better alternative to copper, heat shrink sleeving can used to insulate the wire with the last 1 cm of the electrode left bare. Two additional electrodes (F1) are con nected in parallel to the soil probe electrodes (F). The F1 electrodes are for safety to ensure that the pump is turned off if for some reason water collects in the plant pot saucer. A second safety measure is a float switch fitted to the water reservoir tank. 

When the water level falls too low a floating magnet activates a reed switch and turns off the pump so that it is not damaged by running with a dry tank. Water to the plants can be routed through closed end plastic tubing (with an internal diameter of around 4 to 5 mm) to the plant pots. The number of 1 mm to 1.5 mm outlet holes in the pipe will control the dose of water supplied to each plant. The soil probes can only be inserted into one flowerpot so choose a plant with around average water consumption amongst your collection. Increasing or decreasing the number of holes in the water supply pipe will adjust water supply to the other plants depending on their needs. A 12 V water pump is a good choice for this application but if you use a mains driven pump it is essential to observe all the necessary safety precautions. 

Last but not least the electronic watering can is too good to be used just for holiday periods, it will ensure that your plants never suffer from the blight of over or under-watering again; provided of course you remember to keep the water reservoir topped up…

Author : Robert Edlinger

Readmore → An Electronic Watering Can Circuit Diagram

Sunday, 26 February 2017

The Nexus 8 or Nexus Android 9 L and 64 bit processor could have these features and design


The Nexus 8 or Nexus Android 9 L and 64-bit processor could have these features and design
 
With the introduction of Android L, the latest operating system Google Android Lollipop might be called the  Nexus 8 or Nexus 9 could have another design that we had seen.
The Nexus Nexus 8 or 9 remains a mystery and although we saw earlier as might be the design of this new tablet, the latest concept shows us the tablet based on Android L and a 64 bits.

This recreation was created by Vishal Bhanushali and has posted up a video to illustrate what could be the new product from Google.

The Nexus 8 which would be manufactured by HTC would have a soft material at the back to allow it to have a good grip, especially that it would be very thin and light. This rear appears very similar to the rear of the Nexus July 2013.

8 The Nexus runs the latest version of Google's mobile operating system Android Android Lollipop L or (if they end up calling the company), which offers the Material Design (Design Material), as support for 64-bit processors could be Intel or Qualcomm.

Being manufactured by HTC, the Nexus 8 would have the two speakers in the front that are named BoomSound.

According to the creator of this concept, the Nexus 8 would result by the minimalist aspect of L and Android Nexus devices, like the good style that HTC has shown in recent years.

Although this is only a concept, it is very possible that Google present Neuxs 6 and 8 together with Android Nexus L (Lollopop) possibly in October this year. Wait for it to arrive this date to find which is what Google actually has prepared for us.

Readmore → The Nexus 8 or Nexus Android 9 L and 64 bit processor could have these features and design